
Elegant Design: The round glass cover with a metal frame gives the ceiling light a sophisticated and stylish appearance.
Bright Illumination: Provides ample and even lighting to brighten up any room effectively.
Durable Construction: The brushed nickel frame ensures durability and longevity of the fixture, making it a lasting lighting solution.
Easy Installation: Simple and hassle-free installation process allows for quick setup without complications.
Versatile Application: Suitable for various settings such as living rooms, bedrooms, or hallways, adding a touch of class and functionality to any space.
Energy Efficiency: Utilizes energy-efficient LED bulbs to reduce electricity consumption and lower utility costs over time.
Dimmable Option: Some models may offer dimmable features, providing customizable lighting options to create different ambiances.
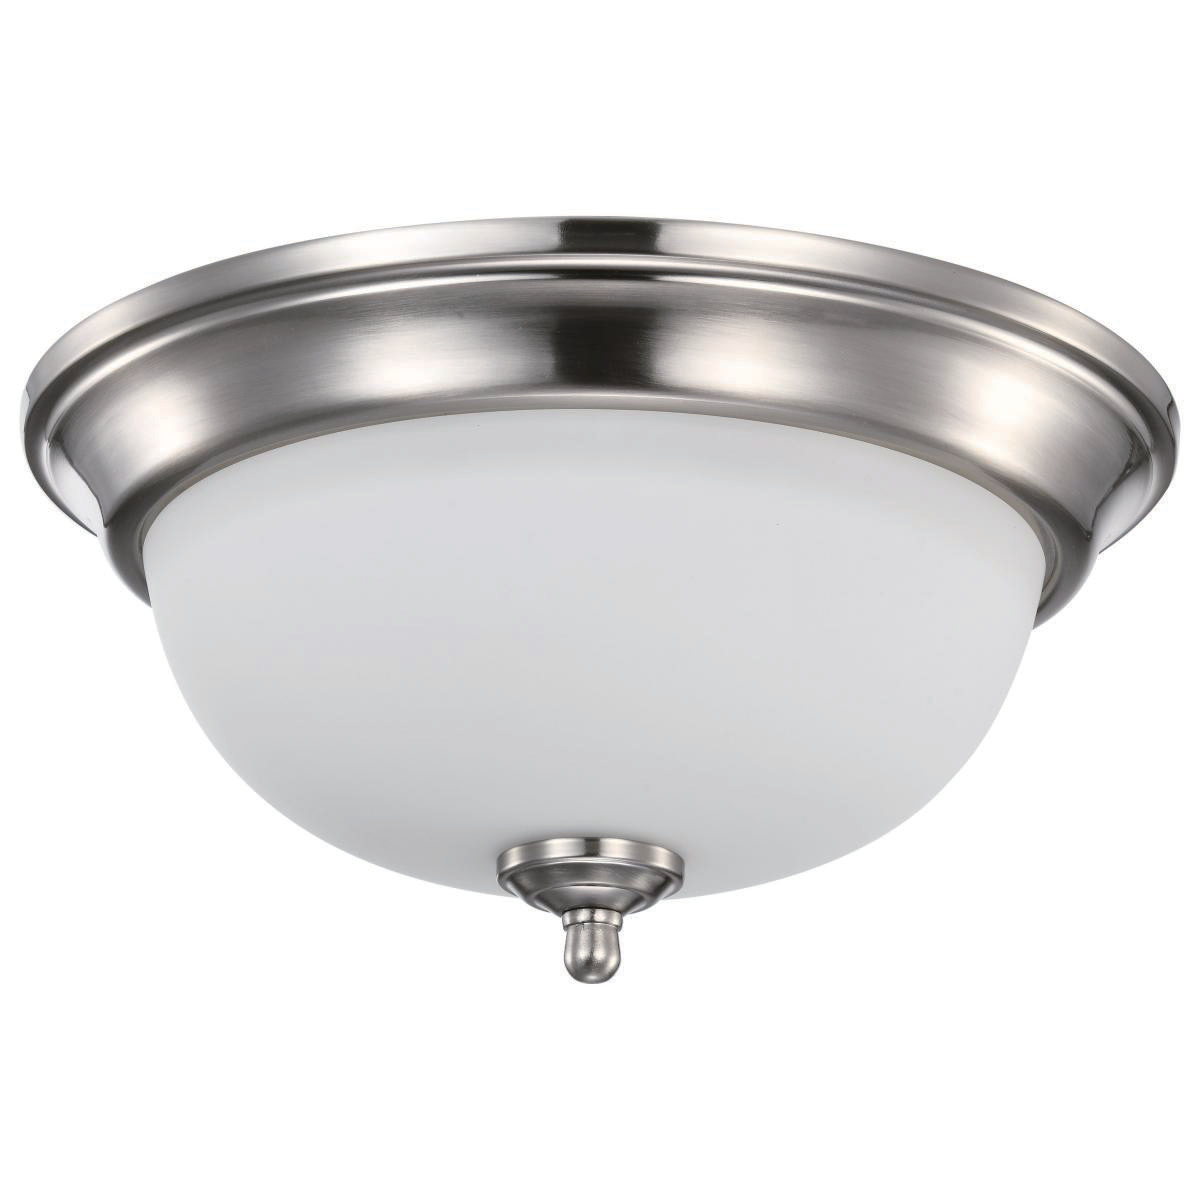
Canopy
The brushed nickel frame ensures durability and longevity of the fixture.
Glass Shade
The classic traditional frosted glass lampshade adds an elegant and soft lighting to the room.
Model | Watt | Voltage | Size | Efficiency | N.Weight | PF | CRI | Dimmable |
FM01 | 19W | 120Vac | 11inch | 90lm/w | 1.1kg | >0.9 | >80 | Yes |
FM01 | 24W | 120Vac | 13inch | 90lm/w | 1.3kg | >0.9 | >80 | Yes |
Installation
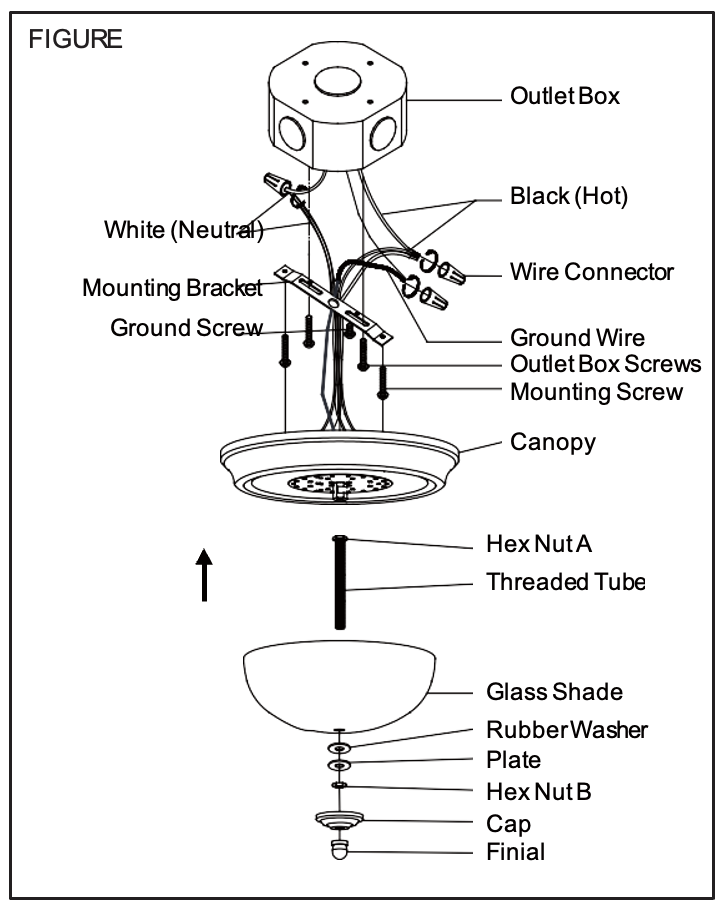
STEP 1: Thread the longer Mounting Screws into mounting holes on Mounting Strap (to be fully tightened later).
STEP 2: Fasten the Mounting Bracket onto the Outlet Box by using the provided 2 Outlet Box Screws.
STEP 3: Tie the Ground Wires from the Fixture and from Outlet Box to the Ground Screw on the Mounting Bracket. Connect the wire without writing on it (with raised ribs) from the Fixture to the white wire (neutral wire) from the supply circuit. Connect the wire with writing on it from the fixture to the black wire (live wire) from the supply circuit. Cover the connections using the provided Wire Connectors. Position wires back inside the Outlet Box.
STEP 4: Place the Fixture over the Outlet Box. Allow heads of Mounting Screws to come out through the large ends of the key holes. Twist the Canopy until the heads of the Mounting Screws slide into the narrow end of keyholes. Tighten Mounting Screws to secure the Canopy
STEP 5: Screw the Threaded Pipe into the Coupling, then secure it with Hex Nut A.
STEP 6: Place the Plate, Rubber Washer, and Glass Shade onto the Threaded Tube, then secure with Hex Nut B, Cap and Finial.
STEP 7: Tum on the power.